Container Vegetable Garden for Flood Areas: 7 Easy Steps
Keep picking greens through heavy late rains by raising buckets, pots and tyres above floodwater with this simple setup.
Published
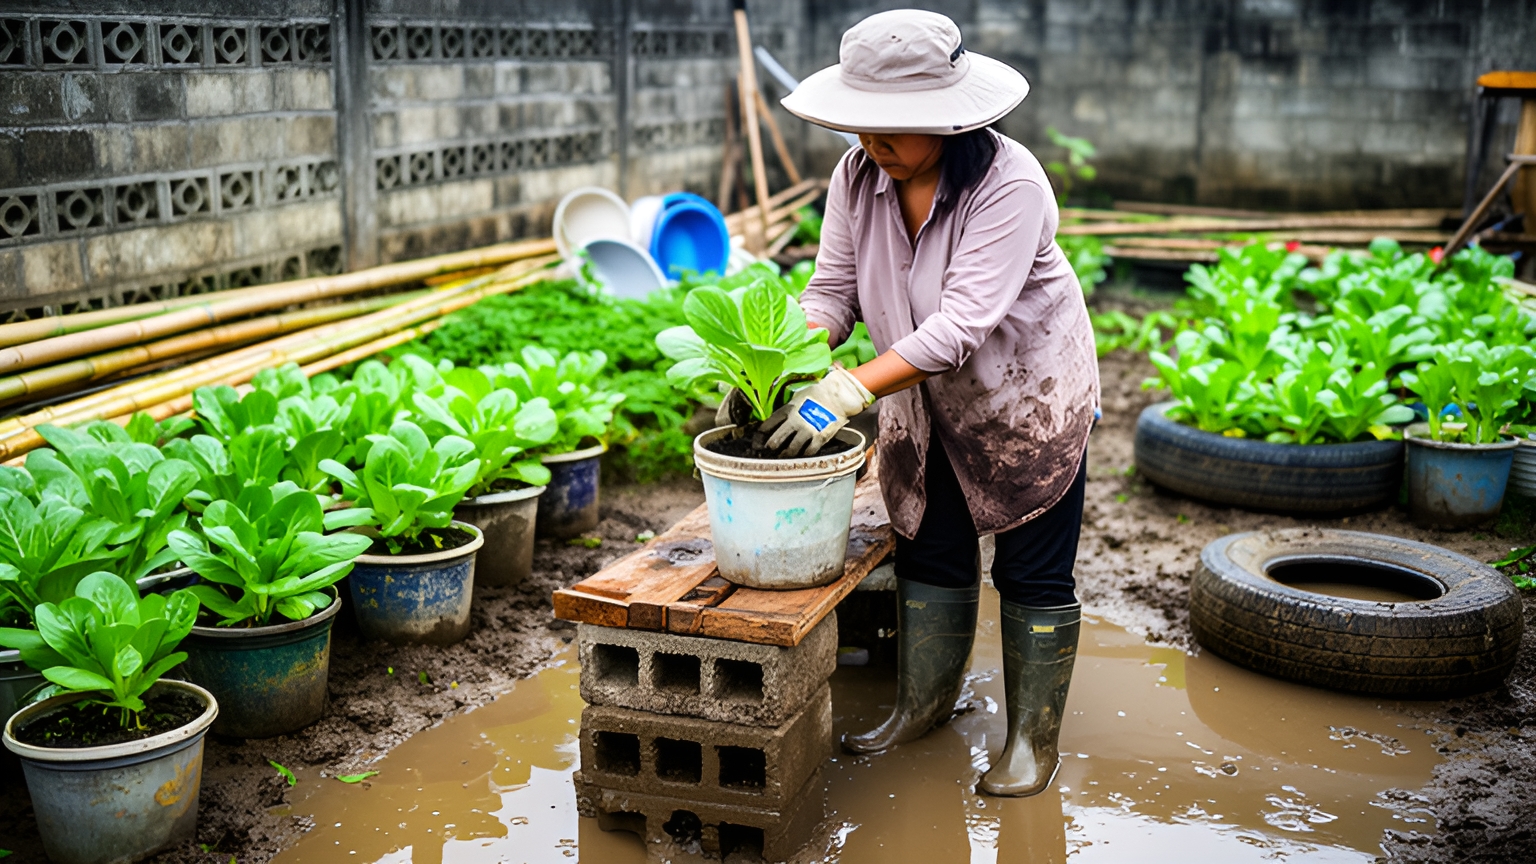
When heavy rain floods a low yard, ground beds can disappear under muddy water for days, and most vegetables die. A container vegetable garden flood plan solves much of this. You grow in buckets, pots and old tyres set on strong stands above the usual water level, so your greens keep growing while the ground below is wet. This guide shows the work in seven steps, using common materials found in many parts of Southeast Asia.
Conditions are different in every country and village. Rain, flood depth, soil and prices all vary. Read the steps, then adjust them to your own place, and ask an experienced local farmer or extension officer if you are unsure.
Container Vegetable Garden Flood Plan: Know Your Water Level
Step 1: Find your flood line and choose a spot
Before you build anything, find out how high the water usually comes. Look for mud lines on walls, fences and tree trunks. Ask older neighbours how high the worst floods of recent years reached. Your containers should sit clearly above that line, with extra space in case this year is worse. In many low yards, this means stands of about 60 cm to 1 metre, but your height may be different.
Choose a spot that gets at least four to five hours of light a day, even under cloudy skies. A place close to the house is best, so you can reach the plants without walking through deep water. A covered porch edge, the space along a sunny wall, or the highest part of the yard all work well.
Do not put heavy containers on a flat roof, a balcony or a weak floor. Wet soil is very heavy. If you want to use any raised part of a building, ask a builder first to check if it can carry the load.
Gather and Prepare Your Containers
Step 2: Collect containers and make drainage holes
Good containers include 10 to 20 litre plastic buckets, old paint tubs (washed well), broken basins, large clay pots, rice sacks, polystyrene fruit boxes and old car tyres. Used buckets are often free or cost around 1 to 3 US dollars each, but prices vary a lot by country.
Every container needs drainage holes. In heavy rain, a container without holes fills like a bowl, and the roots rot within days. Make five to eight holes in the bottom of each bucket, and a few more low on the sides. Use a cordless drill with a 10 to 12 mm bit, or a large nail and a hammer. Wear work gloves and eye protection, because plastic chips can fly. Work on a dry, stable surface, and keep any power tool away from puddles.
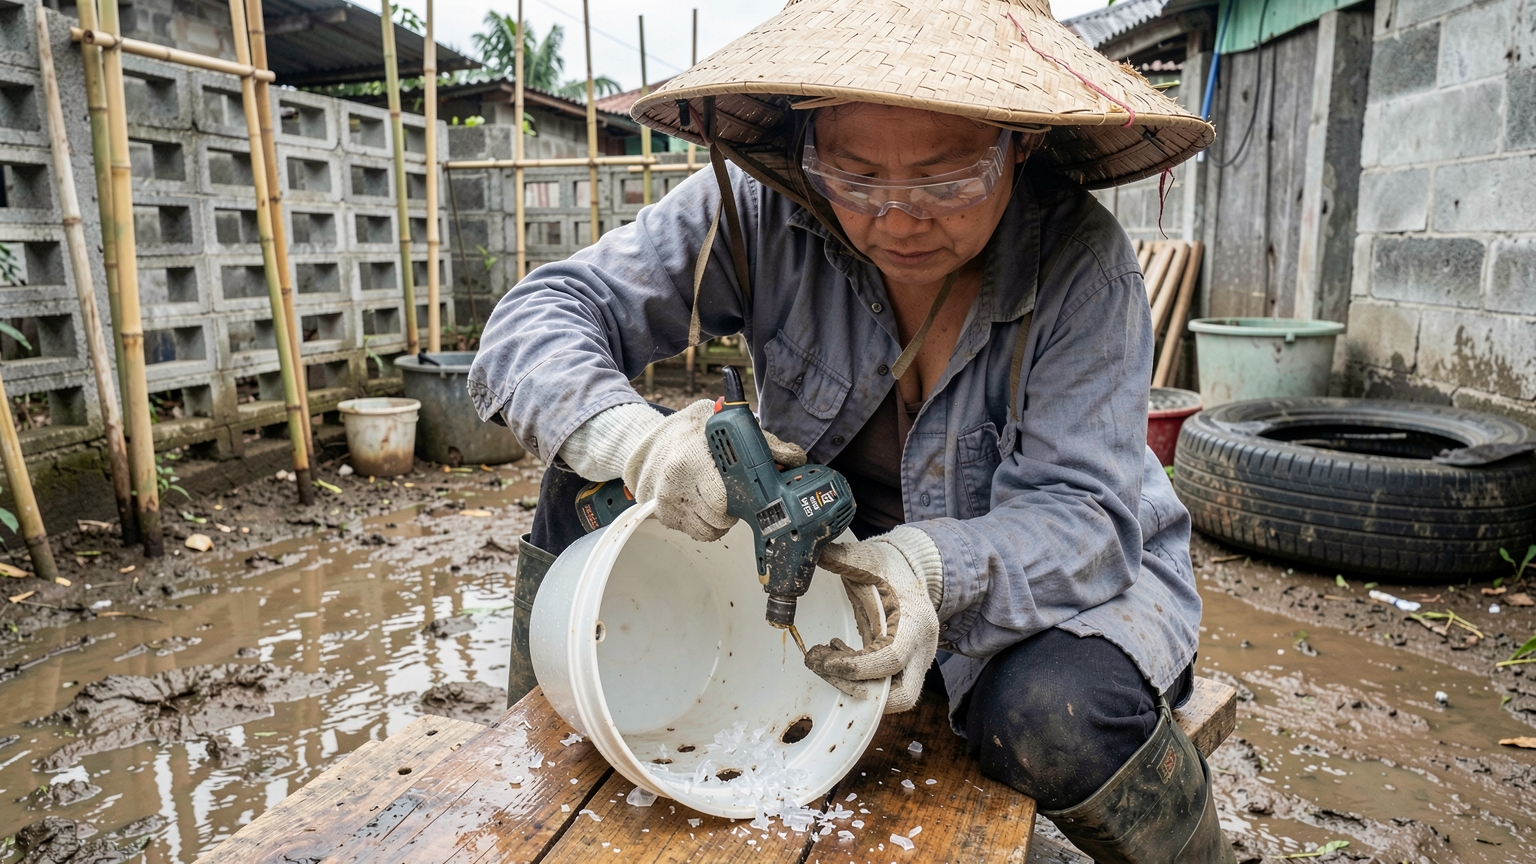
A note about tyres: some gardeners avoid using old tyres for food plants, because they worry that chemicals may leak into the soil over time. If you use them, many people line the inside with an old rice sack or thick plastic sheet with holes cut in it. Tyres also trap rainwater in their curved sides, where mosquitoes breed. Fill the tyre fully with soil, or cut small holes in the inner wall so water can run out.
Build Strong Raised Stands
Step 3: Build a stable platform above the water
A stand must hold a lot of weight and stay steady when the ground is soft. A full 20 litre bucket of wet soil can weigh as much as a sack of rice. Good, simple stands include:
- Stacks of concrete hollow blocks or bricks with thick wooden planks on top
- A bamboo or wooden table with legs set on flat stones or blocks, so they do not sink into mud
- Old wooden pallets on block piers
- Strong steel shelves, if you already have them
Keep the base wider than it is tall, and do not stack blocks more than four or five high without help from someone with building experience. Set the bottom blocks on firm, level ground, and press them down well. Tie bamboo joints with strong wire or rope. Wear gloves and sturdy closed shoes when lifting blocks, and lift with your legs, not your back. Ask a second person to help with heavy planks.
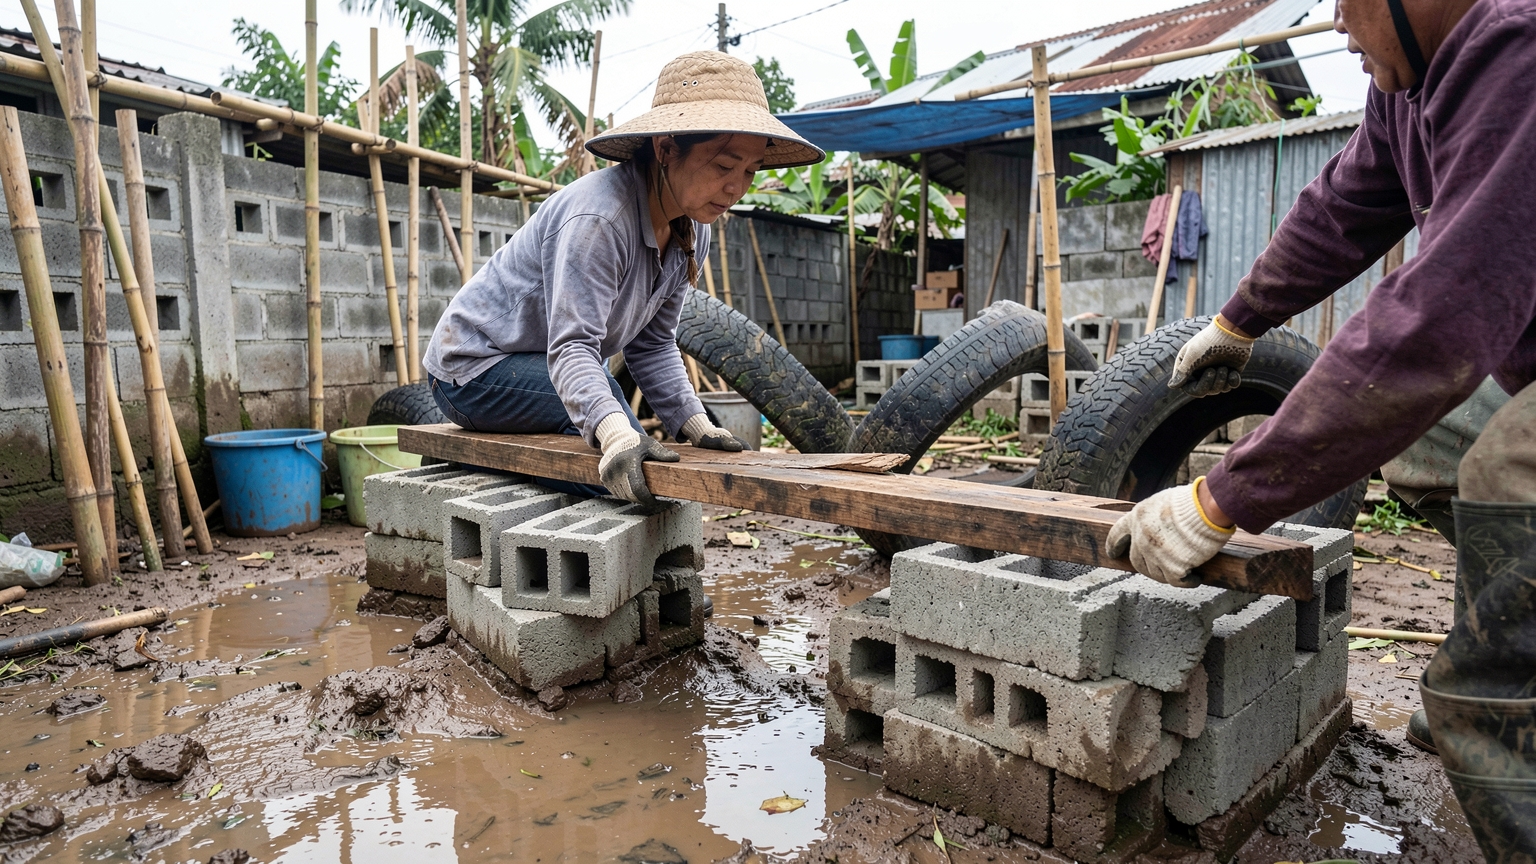
Concrete blocks often cost around 0.30 to 1 US dollar each, depending on the country. Bamboo is free or cheap in many rural areas. Test the stand by pushing it firmly from the side before you load it. If it rocks, fix it now, not after the soil goes in.
Step 4: Fill containers with a light, fast-draining mix
Heavy clay soil stays wet and airless in long rains. Use a lighter mix instead. A common mix is one part garden soil, one part compost or well-rotted manure, and one part rice husk, burnt rice husk (rice husk charcoal) or coconut coir. Put a layer of small stones, broken pot pieces or coconut husk in the bottom to help water flow out.
Wear gloves and a dust mask when mixing dry compost, manure or rice husk charcoal. Fill containers after they are on the stand, using a small pail, so you do not have to lift full, heavy buckets up high.
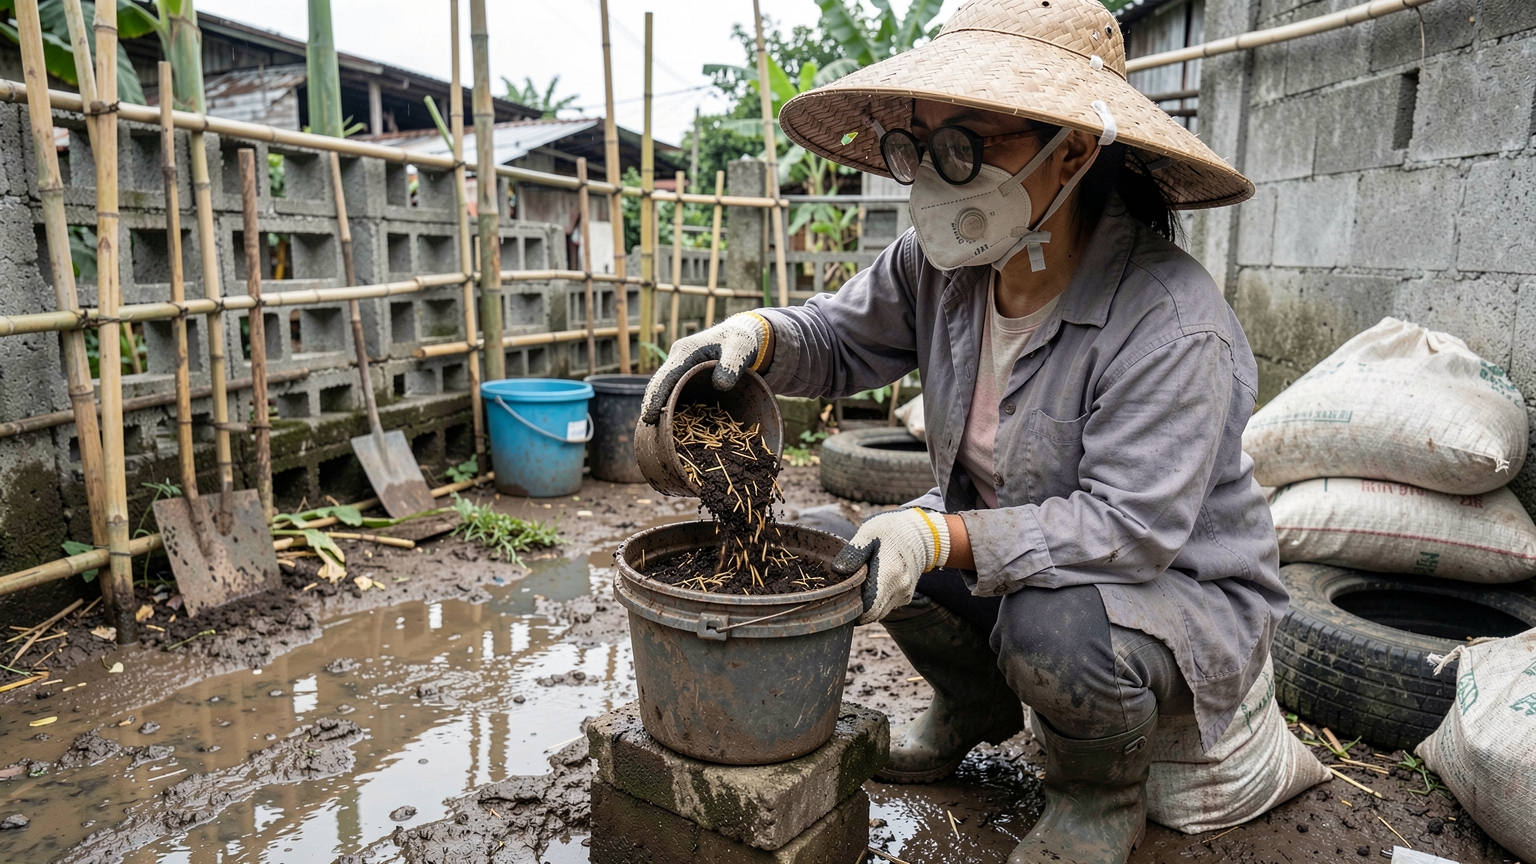
Leave about 3 to 5 cm of space at the top of each container. This stops heavy rain from washing soil over the edge.
Plant, Protect and Harvest
Step 5: Choose crops that grow fast in wet weather
Fast leafy crops do best now. Good choices in many places include:
- Water spinach (kangkong), which handles very wet soil well
- Pak choi, mustard greens and Chinese kale
- Amaranth (bayam) and Malabar spinach
- Spring onions, garlic chives and lemongrass
- Basil, mint and other herbs in smaller pots
Many leafy greens are ready to start picking in about three to six weeks, but this depends on the variety, light and weather. Plant seedlings, not seeds, where you can. Heavy rain often washes small seeds away. Set seedlings at the same depth they grew in the tray, and press the soil gently around them.
Step 6: Shield plants from heavy rain
Strong rain can flatten young plants and wash soil out of pots. A simple cover helps a lot. Build a low frame of bamboo over the stand and stretch clear plastic sheet or shade net across the top, leaving the sides open for air. Tie it down well at every corner so wind cannot lift it. Keep the frame low enough to reach from the ground, so you never need to climb.
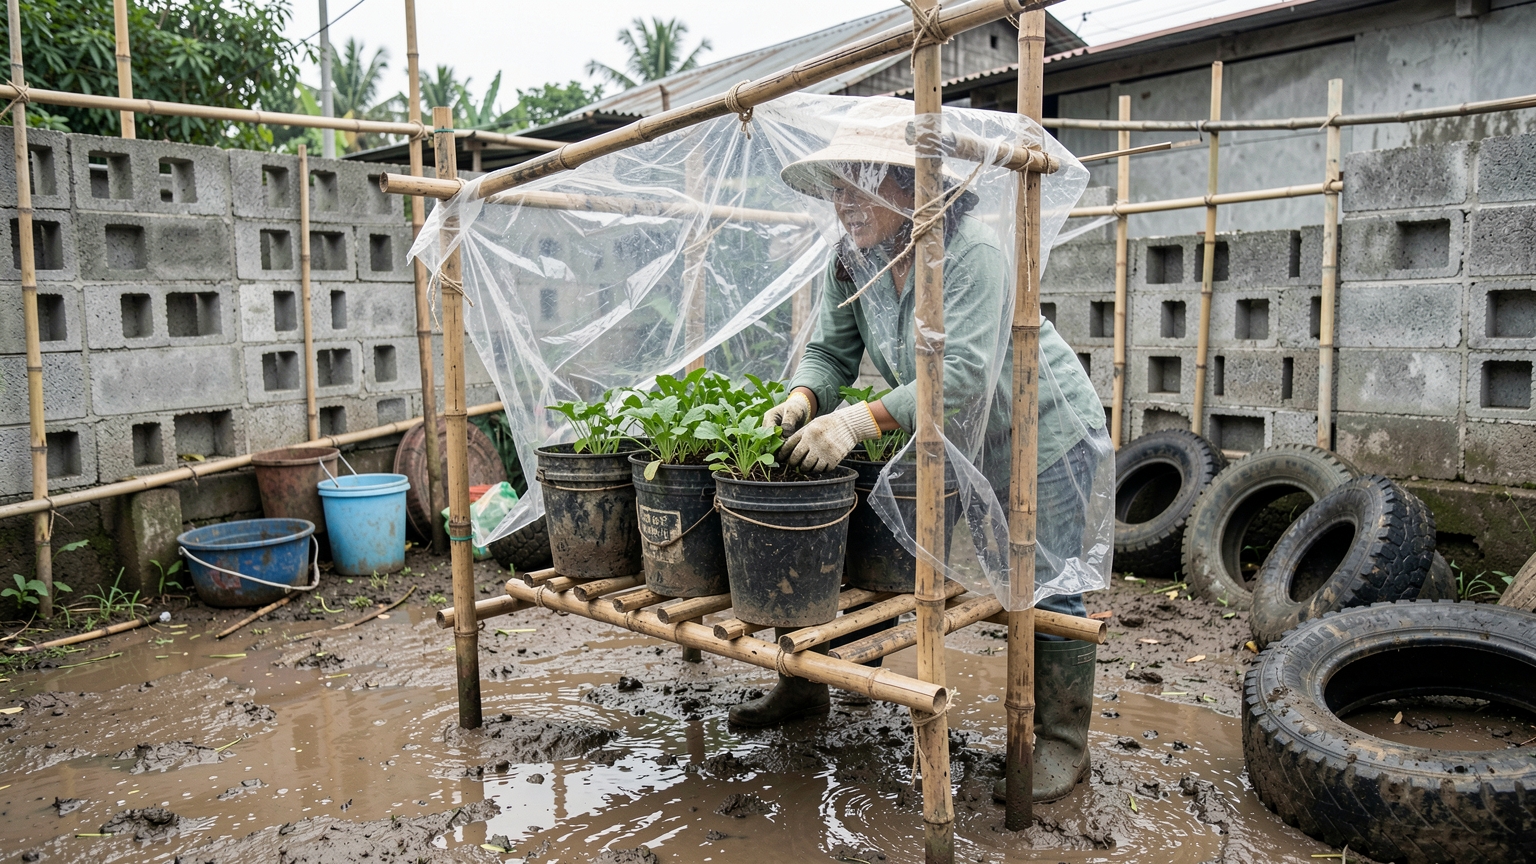
After each storm, check every container. Tip out water sitting in saucers or tyres, clear blocked drainage holes with a stick, and add a little compost if soil has washed away. Pick off yellow or rotting leaves to slow fungus.
Step 7: Harvest often and handle floodwater safely
Pick leaves often, taking the outer leaves first so the plant keeps growing. Wash all vegetables in clean water before eating.
Floodwater can carry sewage, chemicals and animal waste. If floodwater reaches your containers and touches leafy crops, it is safest not to eat those leaves. Throw them away, let the plant regrow, and pick new leaves later. Do not wade through deep or fast floodwater to reach your garden. It can hide holes, sharp objects, snakes and live electric wires. Wear rubber boots and gloves in shallow water, and wash your hands well afterwards.
Safety and Local Conditions
This setup will not suit every home. In areas with deep, fast or long-lasting floods, even raised stands may not be enough, and your family's safety comes first. Follow local warnings and move to higher ground when told to.
Keep these points in mind:
- Check that stands stay firm as the ground softens, and fix any that lean.
- Keep children away from tall stacks of blocks and heavy pots.
- Empty standing water every few days to reduce mosquitoes.
- Ask a builder before placing heavy loads on any part of a building.
- Ask a local extension officer which crops and varieties grow best in your area.
Start small, with five or six containers. Once you see how they handle the rain in your yard, you can add more.